Recently, Google released the Gemini CLI. This wouldn’t be particularly special, but Google announced that the Gemini CLI is free to use, with a daily quota of 1000 free requests. For developers like us, this is truly a godsend.
However, to be honest, I don’t like programming with command-line tools like Gemini CLI. I still prefer using an IDE like Cursor. In the command line, I can basically only do pure “Vibe Coding,” and manual modifications are inconvenient, which I don’t particularly enjoy.
So, how can we leverage the free Gemini 2.5 Pro model in the Gemini CLI? Frankly, using it directly in the command line is not convenient. Whether we use it in a client like Cherry Studio or build our own Agent system, we cannot do without HTTP API protocols. A command-line tool obviously doesn’t provide such an API.
So, can we build a bridge between the two ourselves? The answer is yes. This article will reveal how I created a proxy service to encapsulate gemini command-line calls into a standard, OpenAI-compatible API interface, thereby unlocking the model capabilities within Gemini CLI.
Core Idea
The core idea of this project is actually the Adapter design pattern. This adapter translates the Gemini CLI command-line interface into an OpenAI interface that LLM clients can recognize.
The entire process is shown in the figure below:
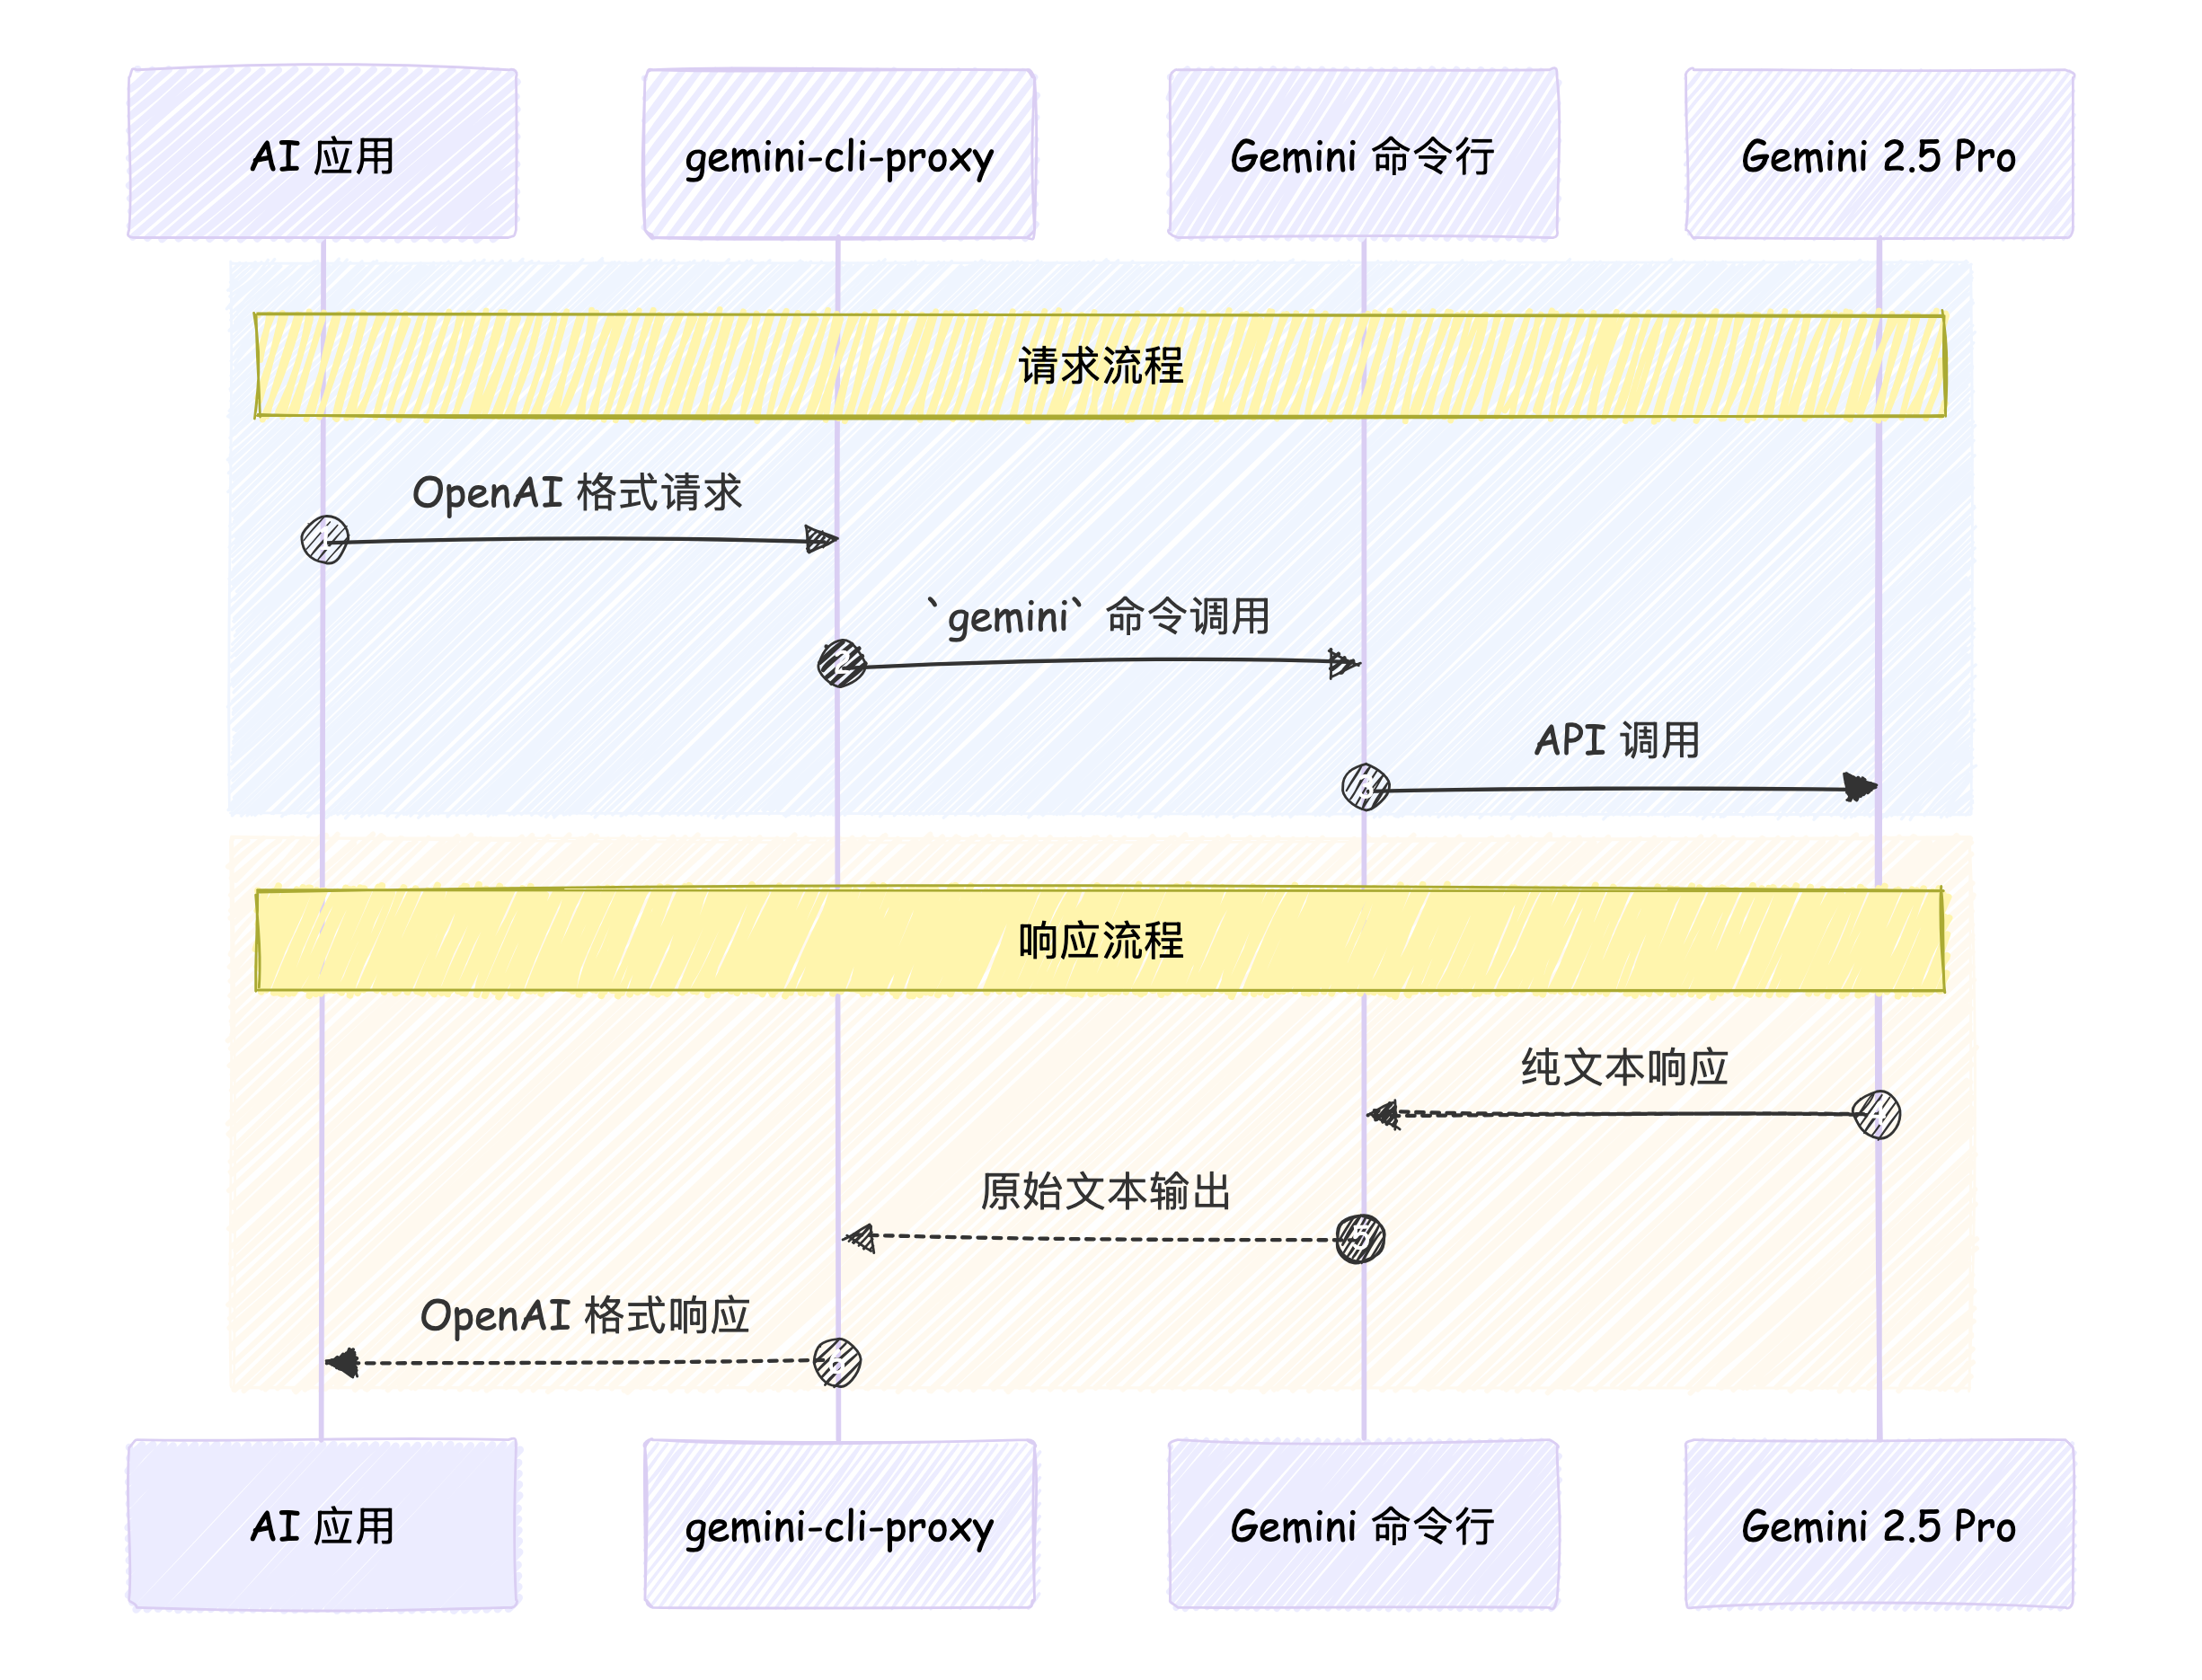
This adapter (which I call gemini-cli-proxy) handles all the conversion work in the middle, making AI applications feel like they are interacting with a standard OpenAI service, while Gemini CLI feels like it’s just receiving and executing a regular command in the terminal.
A Journey of an API Request
So, how exactly does this adapter perform the translation in the middle? Let’s follow an API request through its complete journey.
Step One: Receiving and Parsing the Request
First, I need a web server that can provide a standard OpenAI API. Here, I chose FastAPI because it’s lightweight, fast, and supports asynchronous operations, making it very suitable for a proxy server like this.
The server uses Pydantic models to define a request body structure that is completely consistent with OpenAI’s /v1/chat/completions. This way, any client adhering to the OpenAI specification can send requests directly to my proxy service without modifying any code.
Step Two: From API Request to Command-Line Parameters
When gemini-cli-proxy receives an OpenAI-formatted request, it needs to convert it into command-line parameters that Gemini CLI can understand.
The most crucial conversion is transforming OpenAI’s messages array into a long string prompt that the gemini command can accept.
For example, an API request body like this:
The OpenAI-formatted request body looks like this:
{
  "model": "gemini-2.5-pro",
  "messages": [
    { "role": "user", "content": "你好,请介绍一下你自己。" }
  ]
}
The proxy service will convert the messages array into a plain text string like this:
User: 你好,请介绍一下你自己。This is because the gemini command can only receive prompts in plain text format.
Then, this text will be used as the -p parameter and passed to the gemini command.
gemini-cli-proxy also handles image content in Base64 format, converting it into files and referencing them in the gemini command, but this is a nice-to-have feature that we won’t elaborate on here.
Step Three: Executing Subprocess and Getting Results
The core of the entire project lies in a simple command like this:
gemini -m gemini-2.5-pro -p "User: 你好,请介绍一下你自己。"The gemini command supports running in non-interactive mode, and the results are output to stdout. We just need to launch a subprocess and capture all its stdout output to get the return result from Gemini CLI.
Step Four: Translating Back to OpenAI Format Response
After obtaining the raw plain text result, gemini-cli-proxy needs to re-package this text into a JSON object that conforms to the OpenAI specification.
For example, if Gemini CLI returns a response like this:
你好!我是 Google 训练的大型语言模型。The proxy service will carefully package it as follows, returning it to the client as the final API response:
{
  "id": "chatcmpl-...",
  "object": "chat.completion",
  "created": 1720000000,
  "model": "gemini-2.5-pro",
  "choices": [{
    "index": 0,
    "message": {
      "role": "assistant",
      "content": "你好!我是 Google 训练的大型语言模型。"
    },
    "finish_reason": "stop"
  }],
  "usage": { ... }
}
At this point, the journey of an API request is successfully concluded.
Final Result Display
After gemini-cli-proxy starts, you can use Gemini 2.5 Pro just like any ordinary model service.
You can use the standard openai Python library as usual, simply by pointing the base_url to our locally running proxy service address when initializing the client.
from openai import OpenAI

# Point base_url to the local proxy service
client = OpenAI(
    base_url='http://localhost:8765/v1',
    api_key='dummy-key'  # The key can be anything, as we are using the local CLI
)

response = client.chat.completions.create(
    model='gemini-2.5-pro',
    messages=[
        {'role': 'user', 'content': '写一个 Python 函数,计算斐波那契数列。'}
    ],
)

print(response.choices[0].message.content)
You can also use an LLM client (like Cherry Studio) to use the model from Gemini CLI:
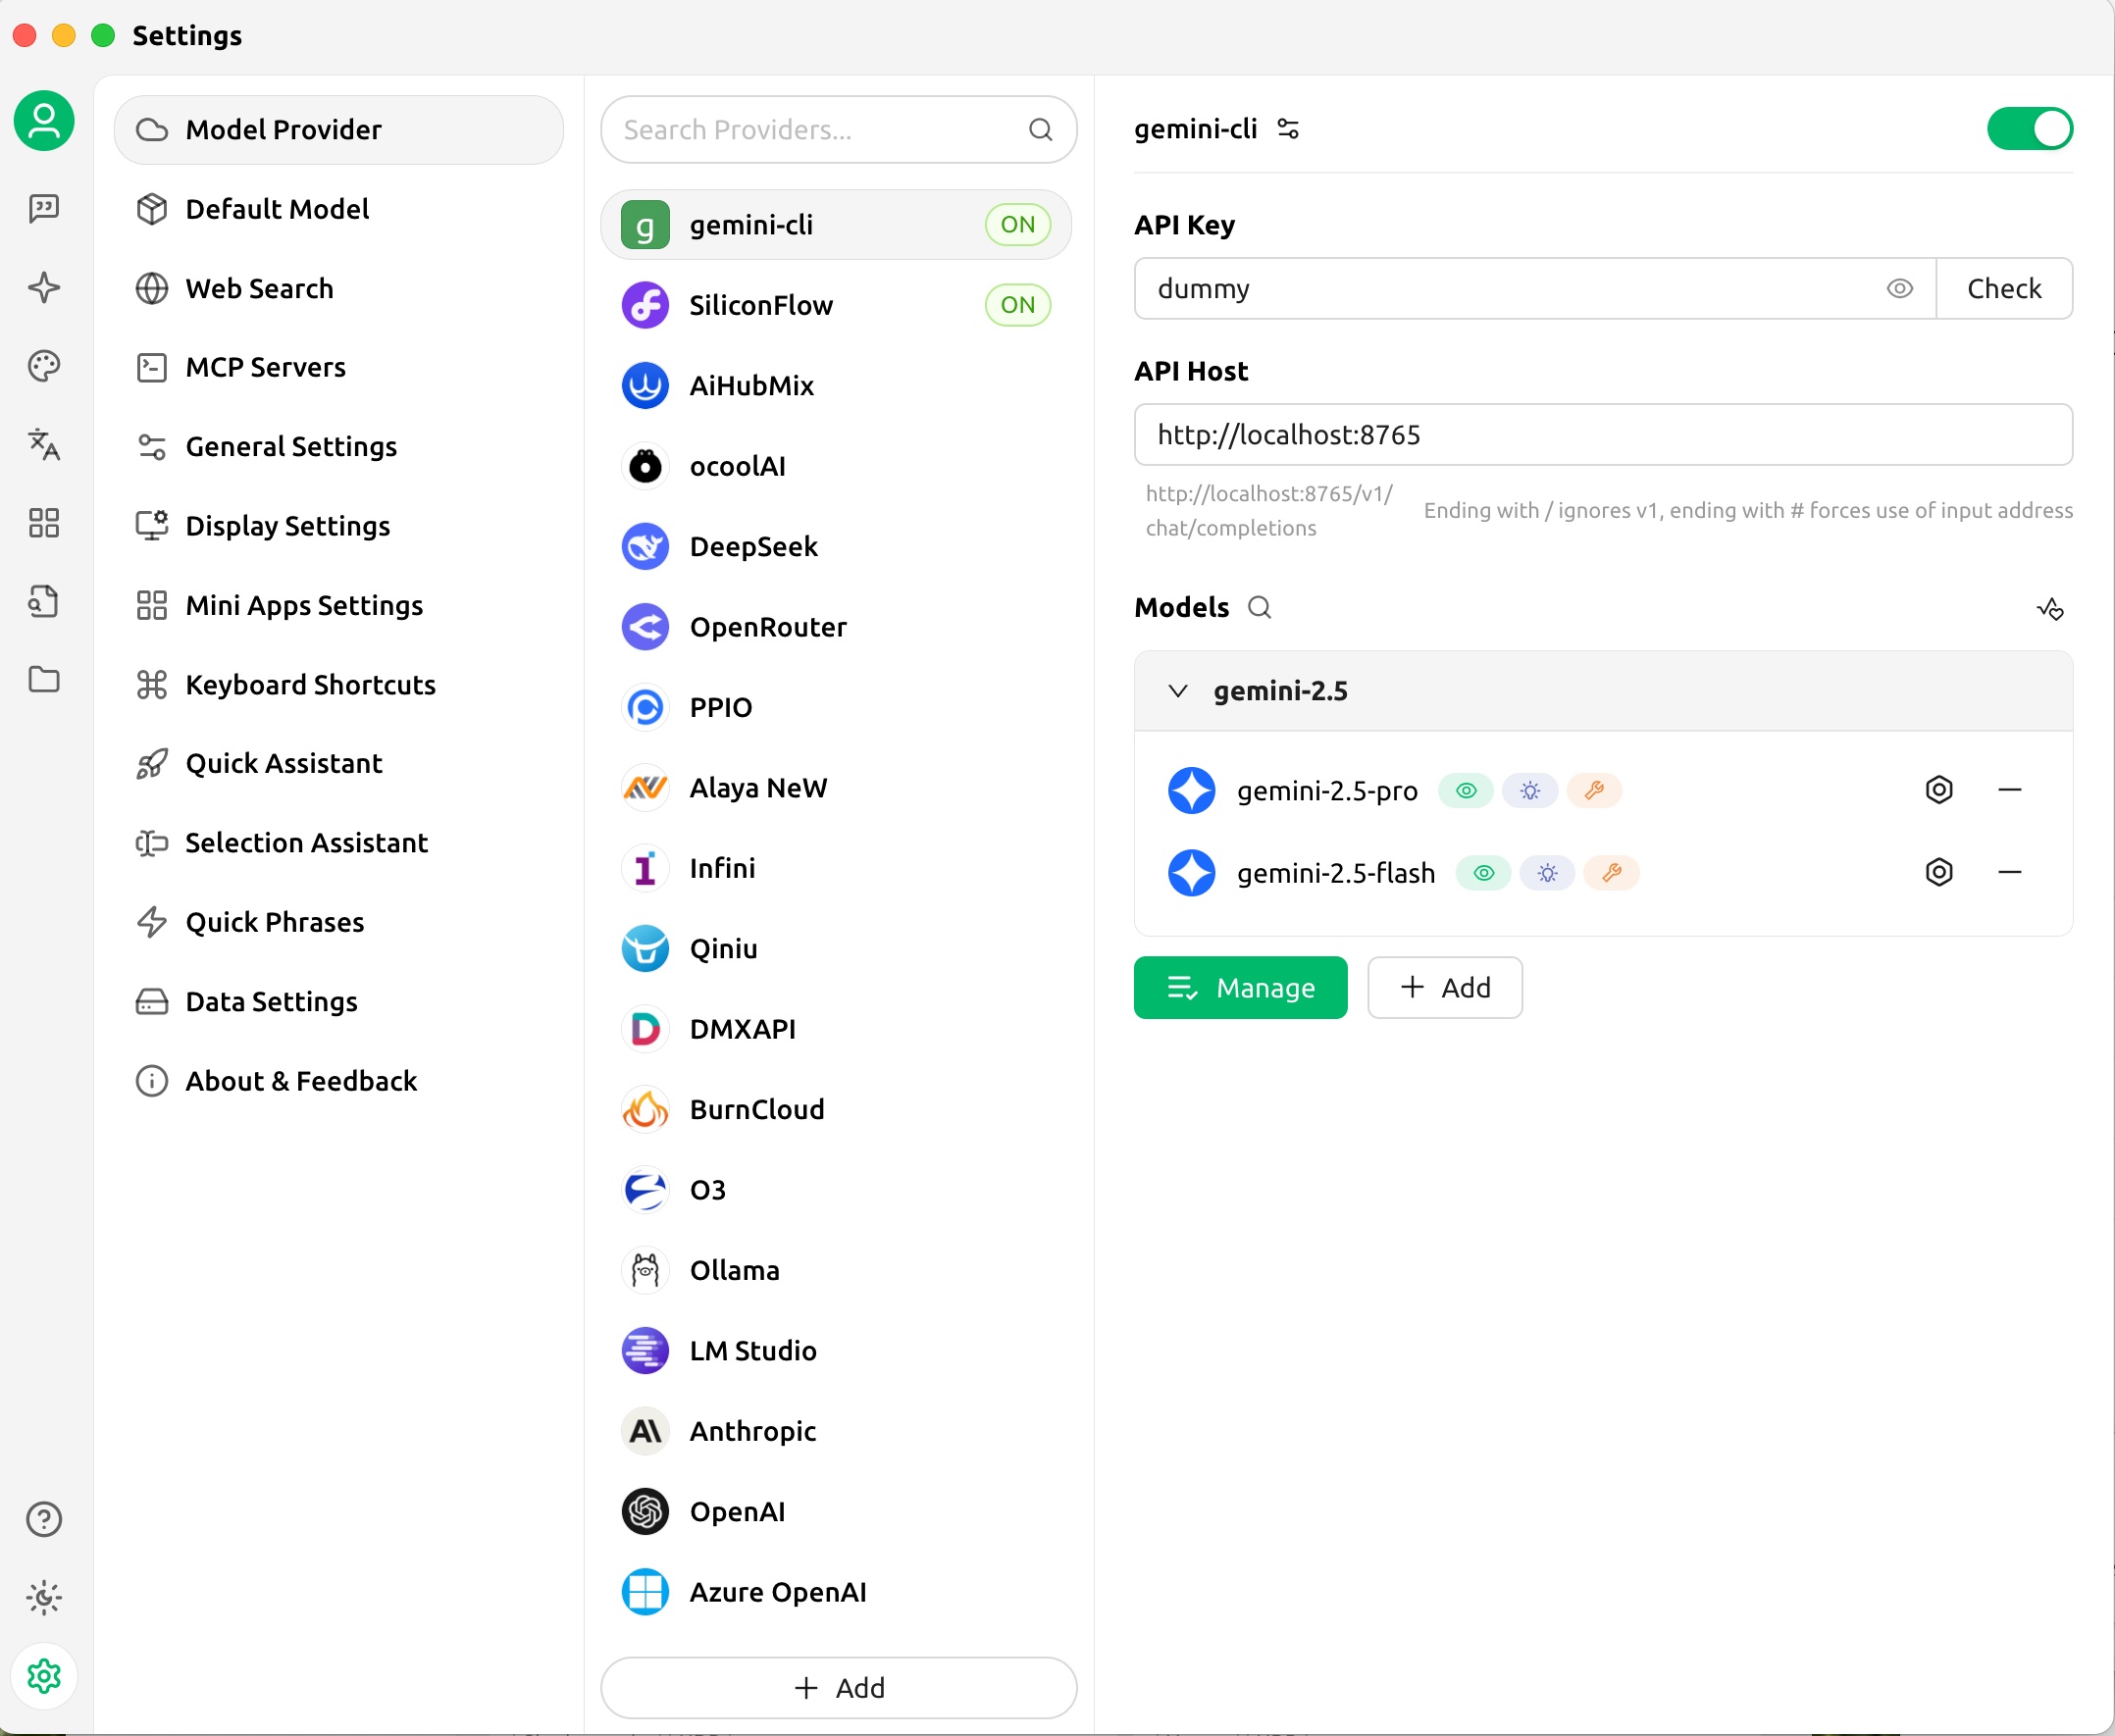
It’s that simple! Through this proxy service, we successfully transformed the Gemini CLI, a command-line tool, into an OpenAI service, thereby integrating it into our various systems!
Summary
By creating a lightweight proxy service, we successfully integrated a powerful CLI tool seamlessly into the mainstream API ecosystem, solving the core pain point of using the free Gemini 2.5 Pro in Agent development.
Interestingly, during the development of this project, I also got to experience modern AI-assisted development. The core functionalities of this project, including interface definition, subprocess management, prompt concatenation, etc., were efficiently completed with the assistance of AI. This further confirms my belief that in the new era, our role as developers is quietly changing: we should focus more on proposing clear goals and elegant architectures, and confidently leave the tedious and repetitive implementation details to capable AI.
If you are also interested in this project, feel free to visit its GitHub repository gemini-cli-proxy and try it out yourself. If it helps you, please give me a Star!