Today’s problem: LeetCode 206 - Reverse Linked List (Easy)
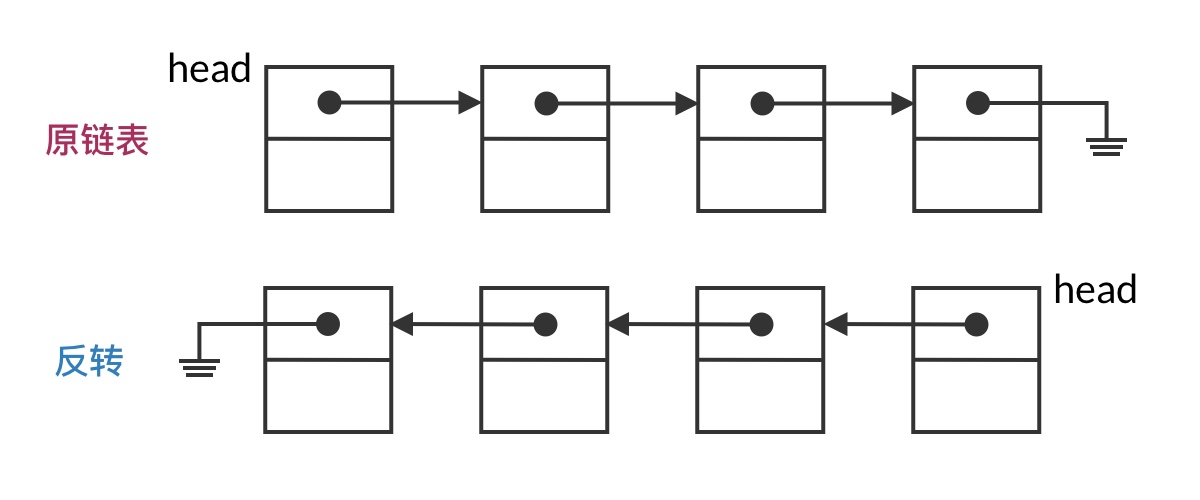
Reverse a singly linked list.
Example:
Input: 1->2->3->4->5->NULL
Output: 5->4->3->2->1->NULL
Reverse Linked List is a problem I encountered during my interview at Alibaba. It’s also a very classic singly linked list problem, and many other problems build upon it. This article will cover:
- Key considerations for linked list problems
- A basic framework for linked list traversal
- Today’s problem: the solution to Reverse Linked List
- Related problems
Key Considerations for Linked List Problems
In interview settings, linked list problems almost always involve singly linked lists. Although doubly linked lists are more commonly used in practice, singly linked lists are better suited for testing interview candidates.
The singly linked list, a relatively “bare-bones” data structure, is essentially designed to test a candidate’s fundamentals in pointer manipulation. Many problems require modifying pointer links, and improper operations can lead to lost nodes or erroneous cycles.
We all learned about linked list data structures back in our C/C++ programming courses. You probably remember various linked list variants — singly linked lists, doubly linked lists, circular linked lists… But in interviews, forget all those fancy variations and stick to the simplest singly linked list operations. The interviewer likely doesn’t want to see your clever tricks:
- Adding a dummy node (an extra head node) can simplify insertion, but interviewers usually require you not to create extra list nodes, and a dummy node obviously counts as an extra node.
- Using C/C++ double pointers can make node deletion code very concise, but if the interviewer isn’t familiar with this technique, they’ll be confused.
So how can we solve singly linked list problems cleanly and clearly? In fact, many linked list problems are formulaic — they can all be reduced to linked list traversal with insertion and deletion operations during the traversal. We can use a linked list traversal framework to solve them.
A Basic Framework for Linked List Traversal
Where does the inherent difficulty of singly linked list operations lie? Compared to doubly linked lists, singly linked lists lack a pointer to the previous node, so when deleting a node, you also need to hold a pointer to the previous node. This makes the traversal process considerably more complex.
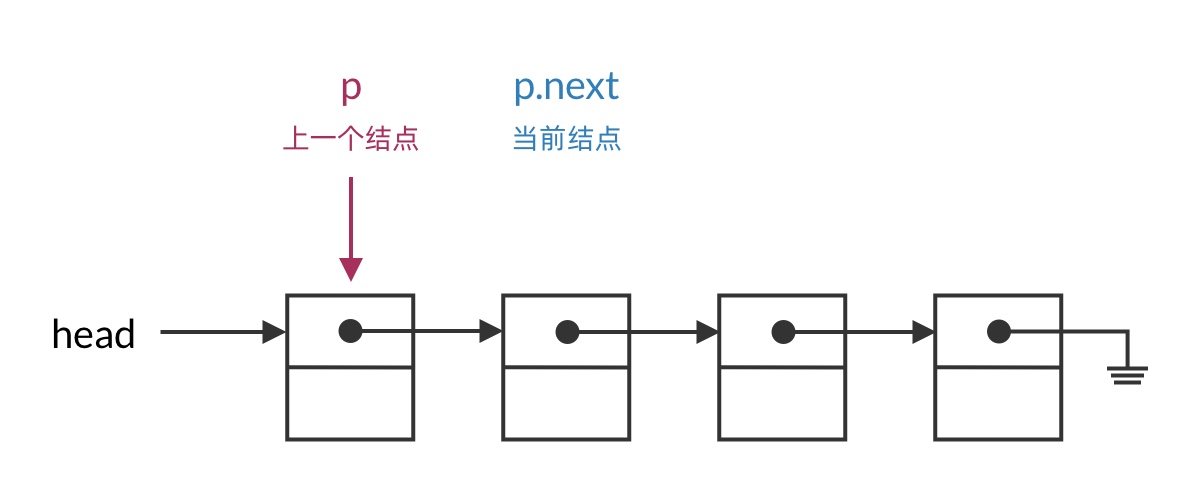
An intuitive approach is to point the traversal pointer to the “previous node” and use p.next = p.next.next for deletion. But this approach carries some cognitive overhead:
- The node you’re examining each time is
p.next, i.e., the next node — which feels awkward - The loop termination condition is
p.next == nullinstead ofp == null— which is error-prone
This is really where the complexity of singly linked list operations lies. We’ve already ruled out advanced techniques like double pointers to simplify things, so is there a clearer way to traverse? Yes, there is. Here I’d like to introduce the linked list traversal framework I’ve been using:
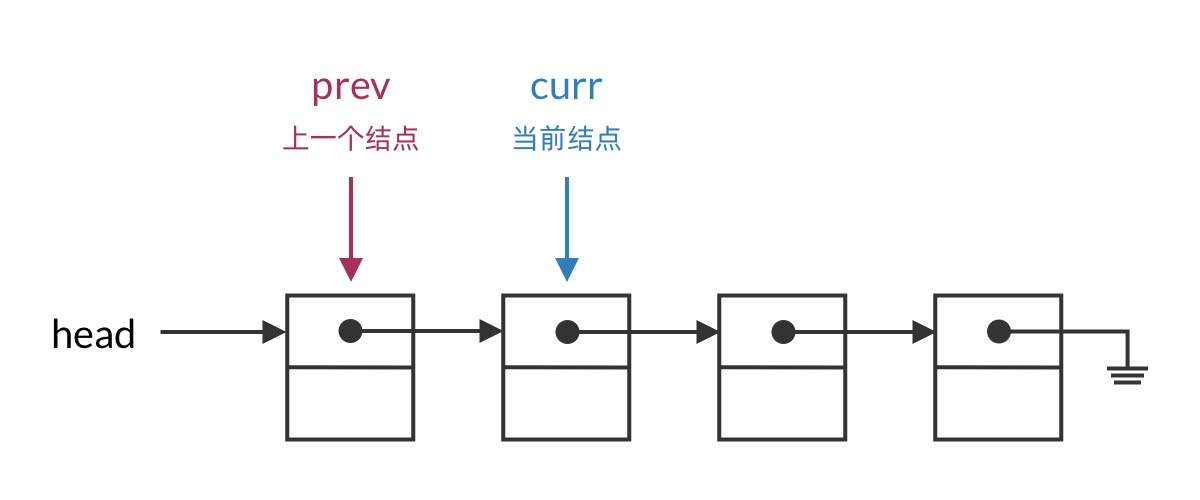
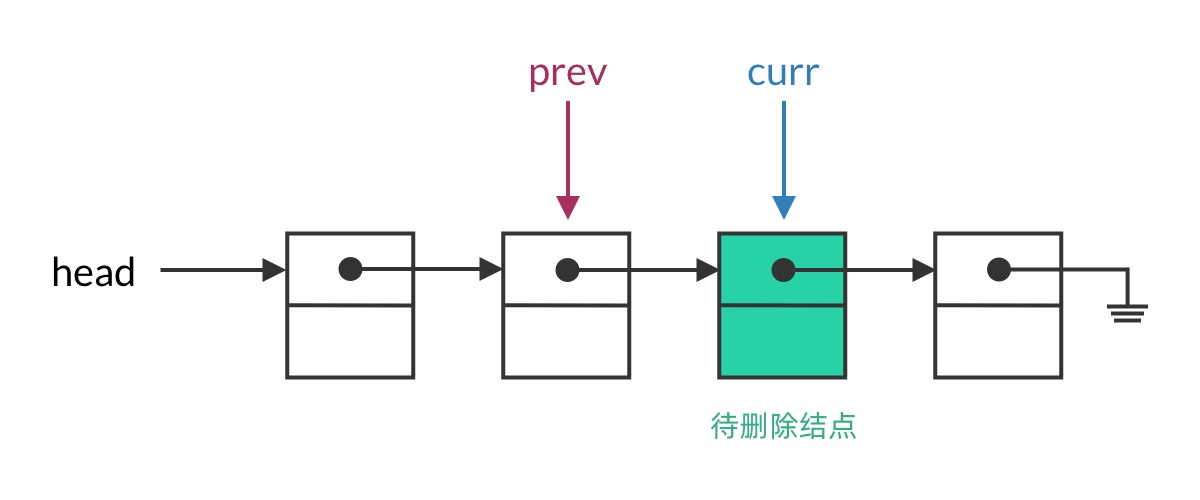
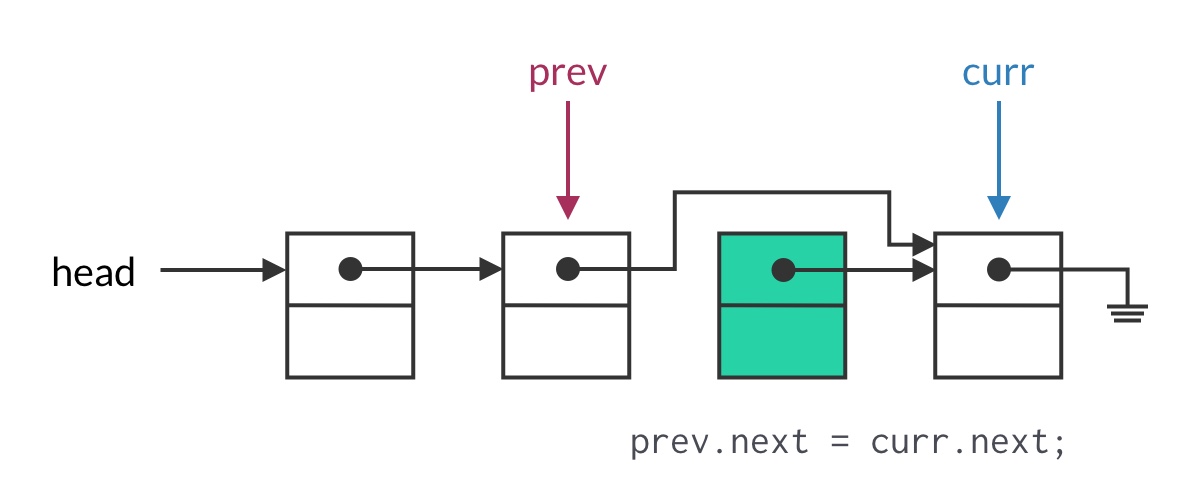
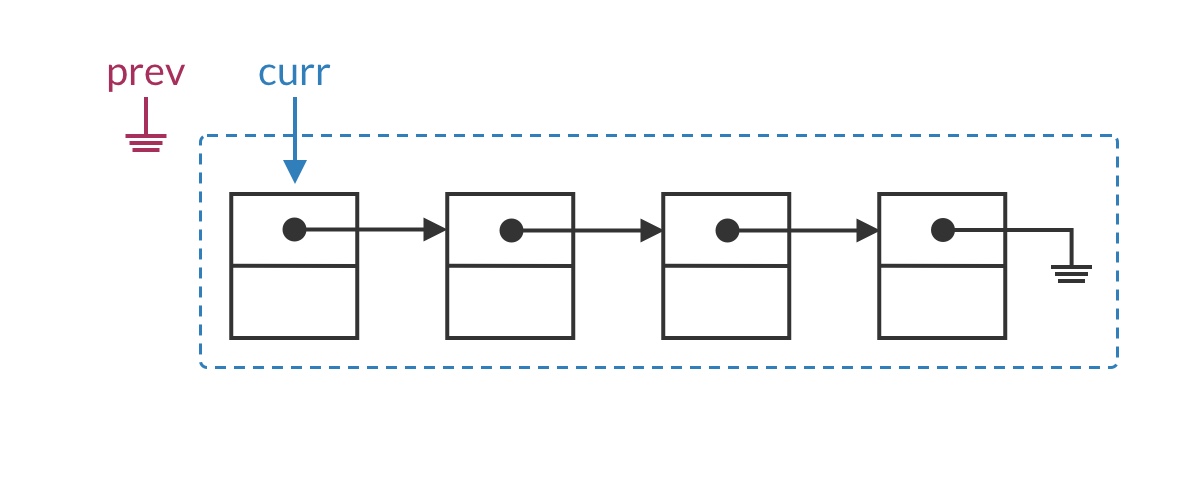
When deleting a linked list node, you need access to both the current node and the previous node. Since that’s the case, let’s use two pointers to traverse the list: a curr pointer for the current node and a prev pointer for the previous node. This gives both pointers clear semantics and makes your code easier to understand.
In code, the linked list traversal framework looks like this:
ListNode prev = null;
ListNode curr = head;
while (curr != null) {
    // Perform operations; prev is the previous node, curr is the current node
    if (prev == null) {
        // Operation when curr is the head node
    } else {
        // Operation when curr is not the head node
    }
    prev = curr;
    curr = curr.next;
}
During traversal, you must always maintain that prev is the node before curr. curr is the primary pointer in the loop — the entire loop’s start and termination conditions revolve around curr. The prev pointer serves as an auxiliary pointer, essentially recording the previous value of curr.
In each iteration, you can decide whether to use the prev pointer based on your needs. Note that prev may be null (when curr is the head node), so you need to check before using it.
Now let’s see how to use this linked list traversal framework to solve today’s problem: Reverse Linked List.
Today’s Problem: Solution to Reverse Linked List
The Reverse Linked List problem has a hidden requirement: you cannot create new list nodes — you can only modify pointers on the existing nodes. This in-place operation is much harder than generating a new linked list.
Step 1: Apply the Framework
This problem is essentially a classic linked list traverse-and-modify operation, so we apply the linked list traversal framework described above. To reverse a linked list, we essentially need to reverse the pointers between all adjacent nodes. So the overall code framework should be:
ListNode prev = null;
ListNode curr = head;
while (curr != null) {
    // Reverse the pointer between prev and curr
    prev = curr;
    curr = curr.next;
}
As you can see, the traversal framework has already laid out the overall approach. We know that this pattern will visit every pair of adjacent nodes, and we know the loop will terminate properly when traversal is complete. All that remains is to focus on how to reverse the pointer between nodes at each step.
Step 2: Implement the Single-Step Operation
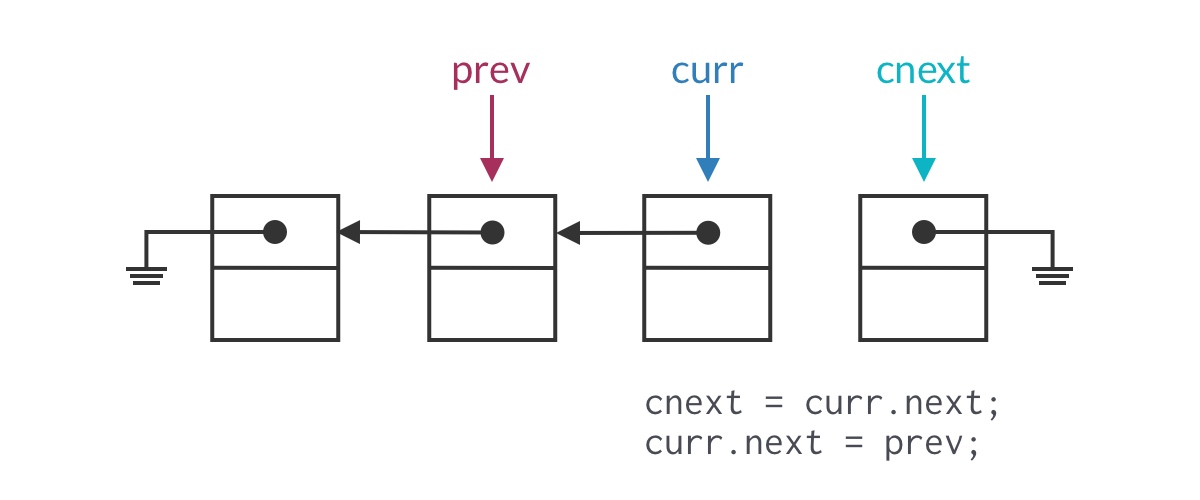
The single-step operation is “reverse the pointer between prev and curr.” This involves changing pointer directions, so we need to be careful about pointer loss. When thinking through this, consider how the current step connects to the previous and next steps.
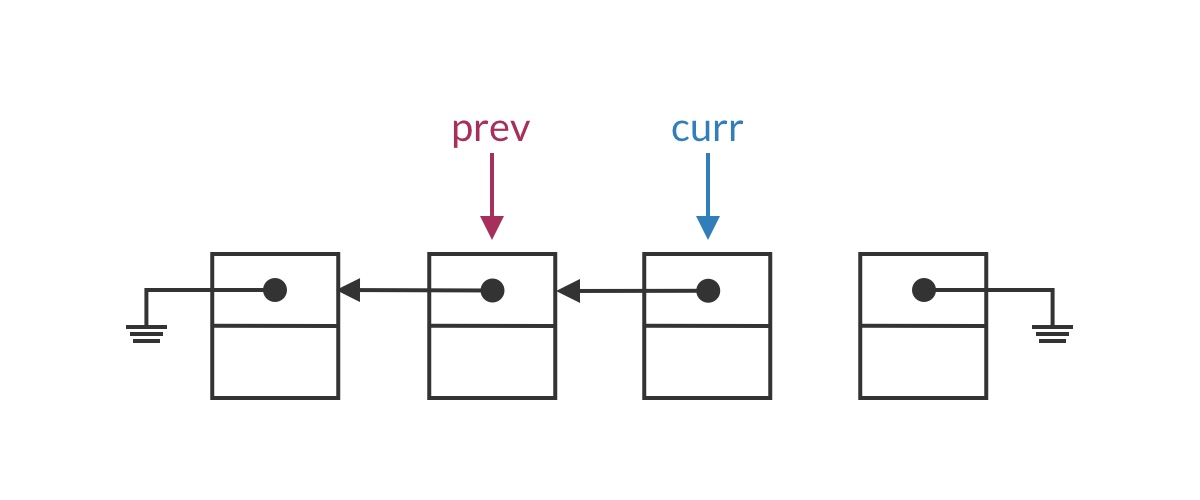
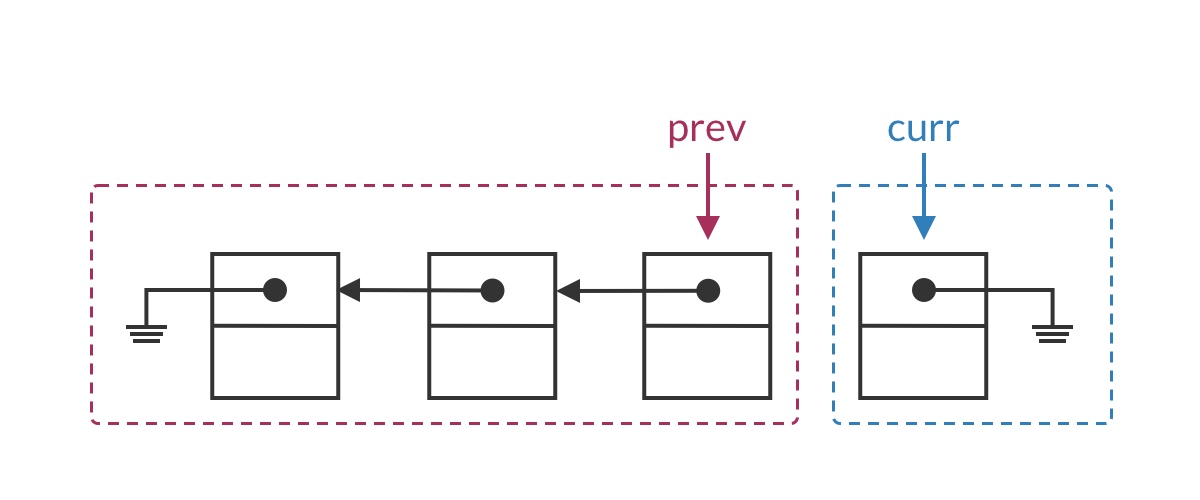
Suppose we’ve traversed to some node in the middle of the list. The list should be split into two parts: the half before the prev pointer has already been reversed, while the half after curr is still in its original order. In this iteration, we set curr’s pointer to point to prev, moving the current node from the second half into the first half.
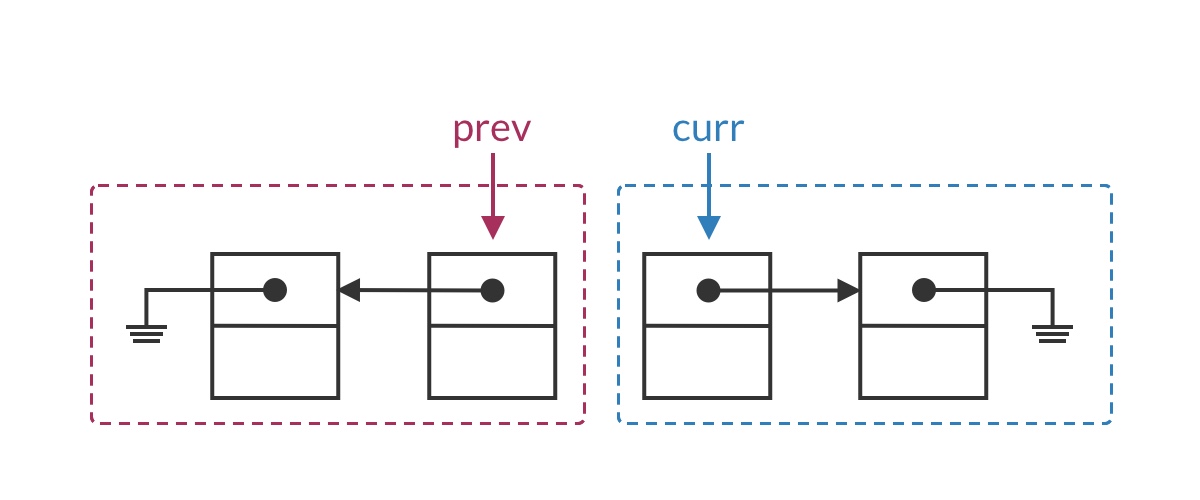
The special case for the head node is that the entire list has not yet been reversed, meaning the first half is empty. Clearly, curr.next should be set to null.

Placing the single-step operation into the code framework, we get a first draft of the solution:
ListNode prev = null;
ListNode curr = head;
while (curr != null) {
    if (prev == null) {
        curr.next = null;
    } else {
        curr.next = prev;
    }
    prev = curr;
    curr = curr.next;
}
Step 3: Handle the Details
The code above is mostly complete, but it still contains an obvious bug: a pointer loss problem.
We use curr.next = prev to reverse the pointer, but this overwrites the value originally stored in curr.next. After losing this pointer, the remaining nodes in the list become unreachable!

Fixing the pointer loss problem is straightforward: use a temporary pointer to save curr’s next node. As shown below:
However, this means we also need to adjust the pointer update operations in our traversal framework accordingly. The framework isn’t meant to be rigid — it needs to be adapted flexibly based on the actual problem.
Based on these two detail fixes, we arrive at the complete code:
ListNode reverseList(ListNode head) {
    ListNode prev = null;
    ListNode curr = head;
    while (curr != null) {
        ListNode cnext = curr.next;
        if (prev == null) {
            curr.next = null;
        } else {
            curr.next = prev;
        }
        prev = curr;
        curr = cnext;
    }
    return prev;
}
In the code above, the two branches of the if statement could actually be merged, but they are kept separate here for clarity.
Summary
To summarize, when solving this type of singly linked list problem, we follow these steps:
- Determine whether the problem involves linked list traversal and modification, then apply the linked list traversal framework
- Work out the single-step operation and insert the code into the traversal framework
- Check for details like pointer loss
Many more complex linked list problems build upon Reverse Linked List. Here are a few related problems on LeetCode:
- 203 - Remove Linked List Elements A basic linked list deletion problem
- 83 - Remove Duplicates from Sorted List Remove duplicate nodes from a linked list
- 92 - Reverse Linked List II Reverse a portion of a linked list
I hope this explanation helps you feel more confident when tackling linked list problems.